Data security is the responsibility of everyone in the organization. From ETL developers to business users and data consumers, anyone who relies on data shares a responsibility to use it appropriately. However, with several different systems and, in many cases, silos, it can often be difficult to effectively put this ethos into practice.
Immuta is the data security platform that seamlessly enables shared responsibility of access and security between organizations, people, and data consumers. In this blog, we will discuss the shift to a security-first data architecture with Databricks and Immuta, and how creating policy-as-code spans the data lifecycle from ingestion to consumption by applications and users.
Immuta allows Databricks users to manage data security and access control in three phases:
Each of these phases is essential to security-first data architectures. Immuta’s goal is to help simplify, reduce, and scale data policies so that data teams don’t become overwhelmed with managing rules that require constant maintenance.
In this example, we’ll walk through how to use Immuta to build a masking policy that obfuscates a credit card field based on the data type rather than hard-coded column names.
Let’s start with a sample transaction table. Here’s what this table looks like before we apply a masking policy:
Our goal is to create a policy that masks the data like this:
1. Registering a Databricks Data Source with Immuta
The first step in the process of building a policy is to tell Immuta to protect the table, which starts by registering a data source. Once registration is done, we can create a connection to the Immuta API from our notebook and run sensitive data detection. This will allow us to understand what types of sensitive data we have and where it lives, and build an appropriate policy that can be applied against our table of credit card data.
Let’s walk through the first two phases of implementation for data access controls with the Immuta API. In our Databricks notebook, we will illustrate how Immuta automates and orchestrates policy creation in a scalable way.
The first thing we need to do is create a connection to Immuta. Below is a sample Python function that we can call to create a connection with a bearer token.
def connect(immuta_apikey, immuta_url):
payload = {"apikey": immuta_apikey } r = requests.post(immuta_url + '/bim/apikey/authenticate', data=payload) bearer_token=r.json()['token'] header_yaml={"Authorization": "Bearer " + bearer_token , "Content-Type": "text/plain"} return header_yaml
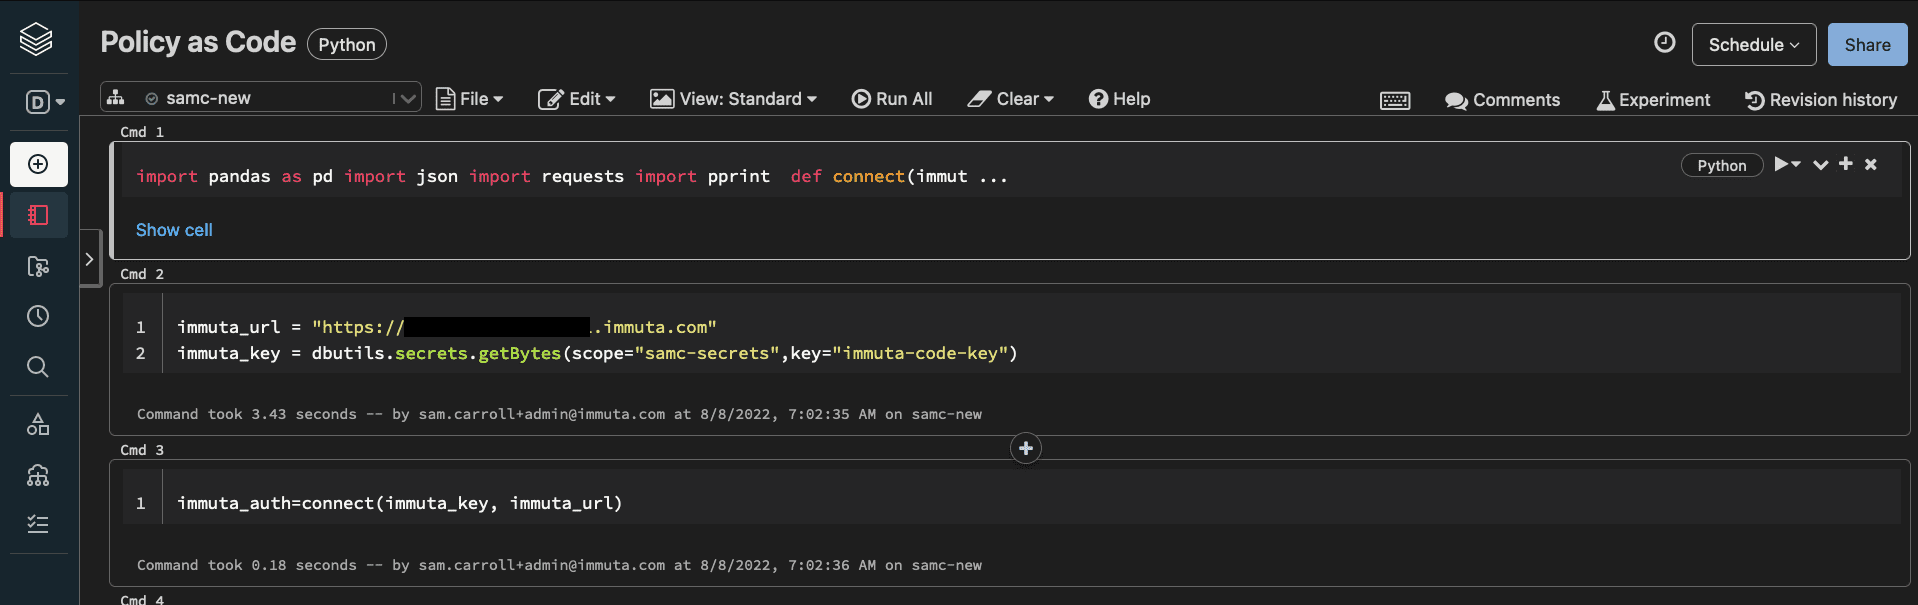
Now that we have the token, we can start interacting with Immuta directly from Databricks.
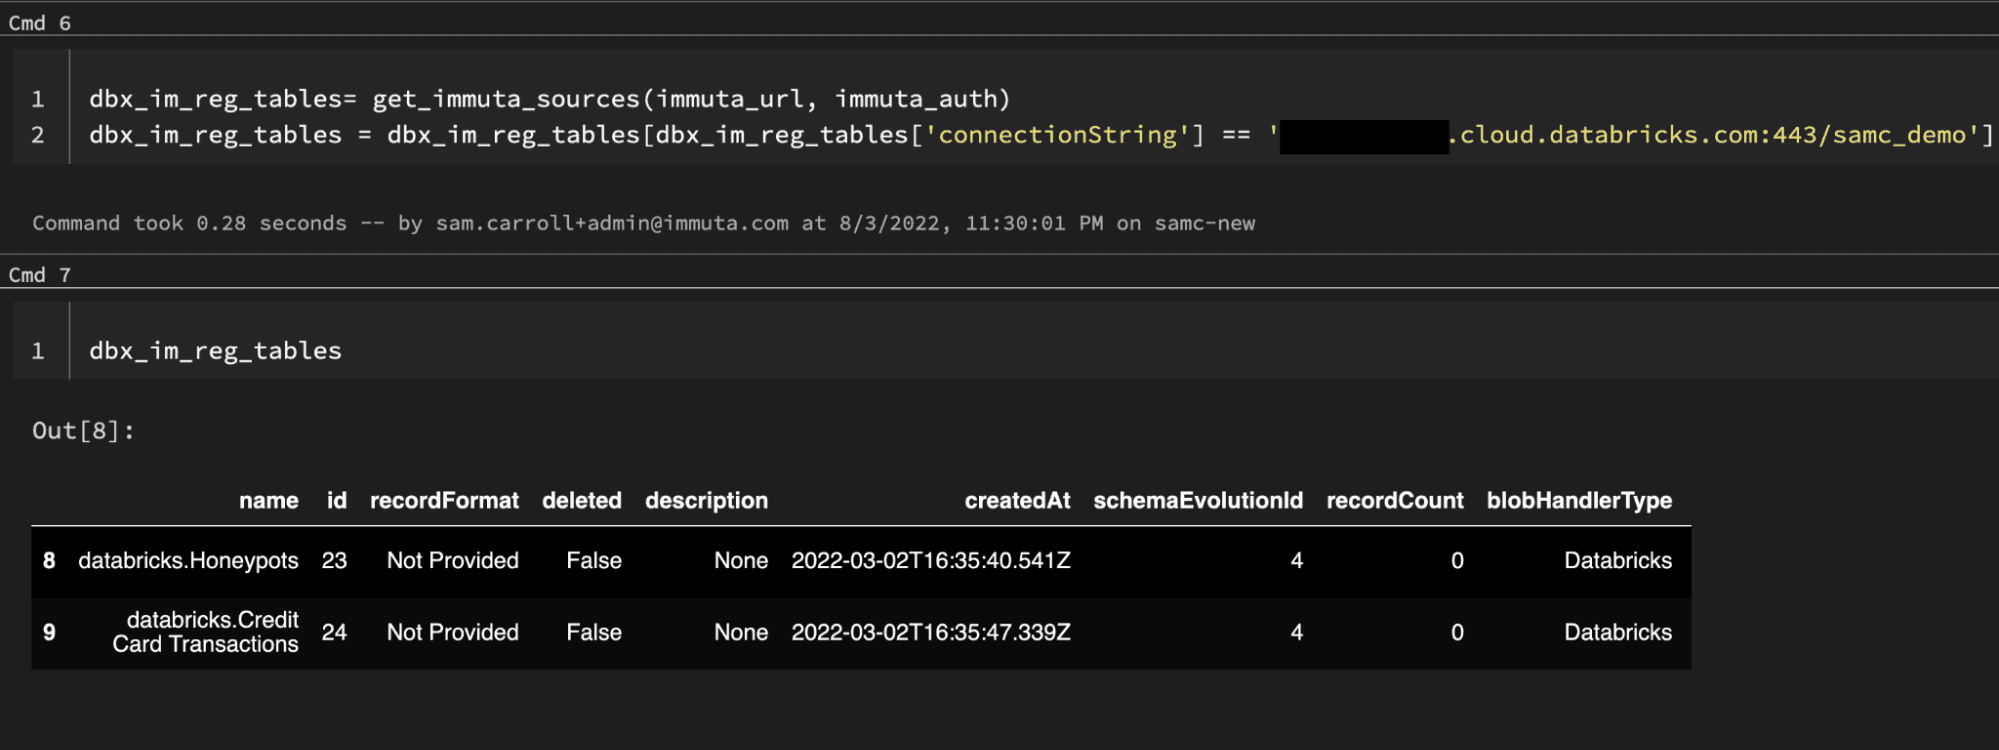
First, we will make sure that the table has been registered. This is done by calling the Immuta API to list all data sources. Since we don’t know the data source id, we will filter all of our sources by the name of our Databricks host to see if the table has been registered:
immuta_auth=connect(immuta_key, immuta_url)

dbx_im_reg_tables= get_immuta_sources(immuta_url, immuta_auth)
dbx_im_reg_tables = dbx_im_reg_tables[dbx_im_reg_tables['connectionString'] == databrickshost.cloud.databricks.com:443/samc_demo']
The function get_immuta_sources is just a wrapper function for simplicity. It passes the appropriate Immuta API path to a function that sends a request object with authorization to the API. Below is an example of these functions. Throughout this blog, we’ll use wrapper functions to highlight what exactly the call is doing:
def get_immuta_endpoint(immuta_url, header_yaml, uri,record_path):
r = requests.get(immuta_url + '/' + uri , headers=header_yaml) if record_path == '': df = pd.json_normalize(r.json()) else: df = pd.json_normalize(r.json(),record_path=record_path) return df
def get_immuta_sources(immuta_url, header_yaml):
return get_immuta_endpoint(immuta_url, header_yaml,'dataSource', 'hits')
Now, let’s run this in Databricks and see if our credit card table has already been registered with Immuta:
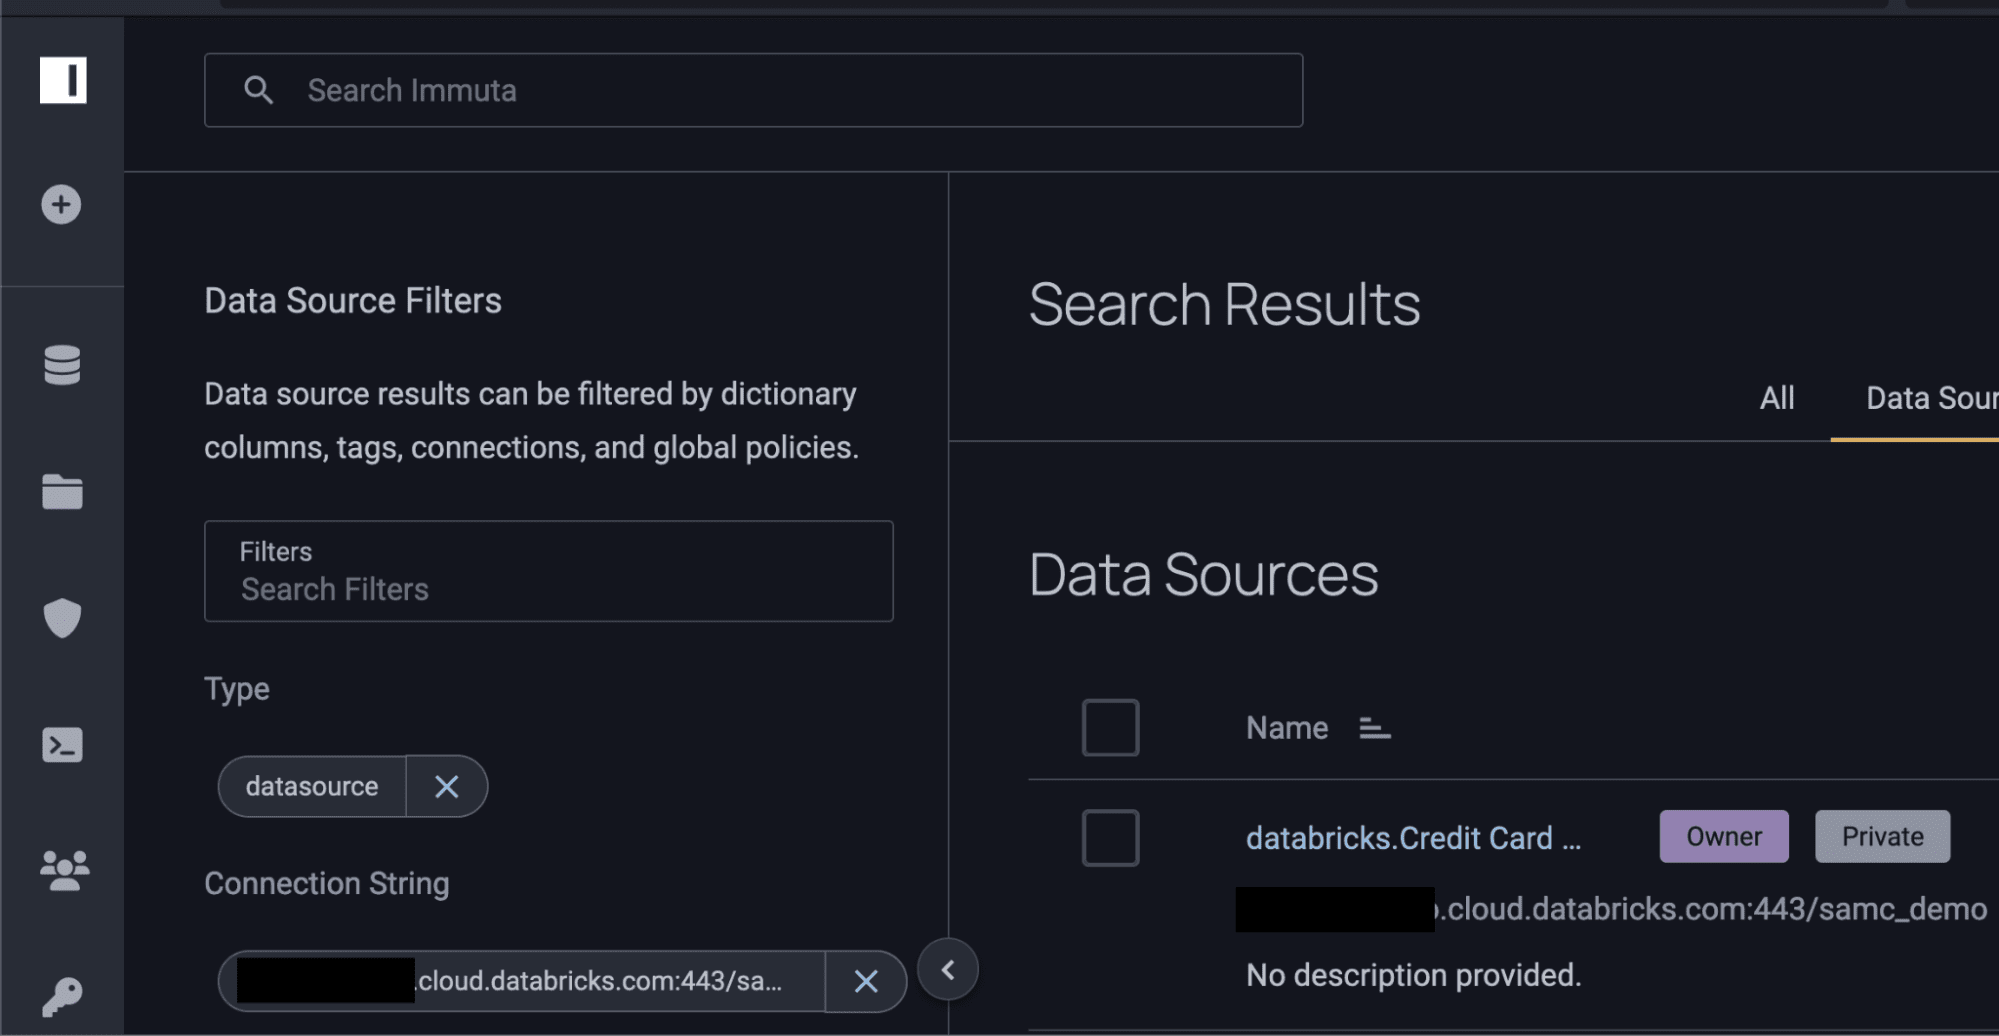
This could also be done by searching in the Immuta UI:
2. Utilizing Sensitive Data Discovery for Databricks Policies
Now that we know the table has been registered (this step could also be done programmatically), let’s take a look at what data access rules the data owner has in place. We will do this by looking up the data source by its id, as listed above:
#use the id from the list data source command to get additional information from Immuta about this table:
credit_card_tbl = immuta_sources[dbx_im_reg_tables['id'] == 24]
#unnest the json policy conditions for subscribing to the dataset:
for subscription_condition in credit_card_tbl["subscriptionPolicy.exceptions.conditions"]:
pprint.pprint(pd.json_normalize(subscription_condition))
#output: type authorization.auth authorization.value 0 authorizations Department Analytics 1 authorizations Department Finance
The image below shows the outputs of these commands:
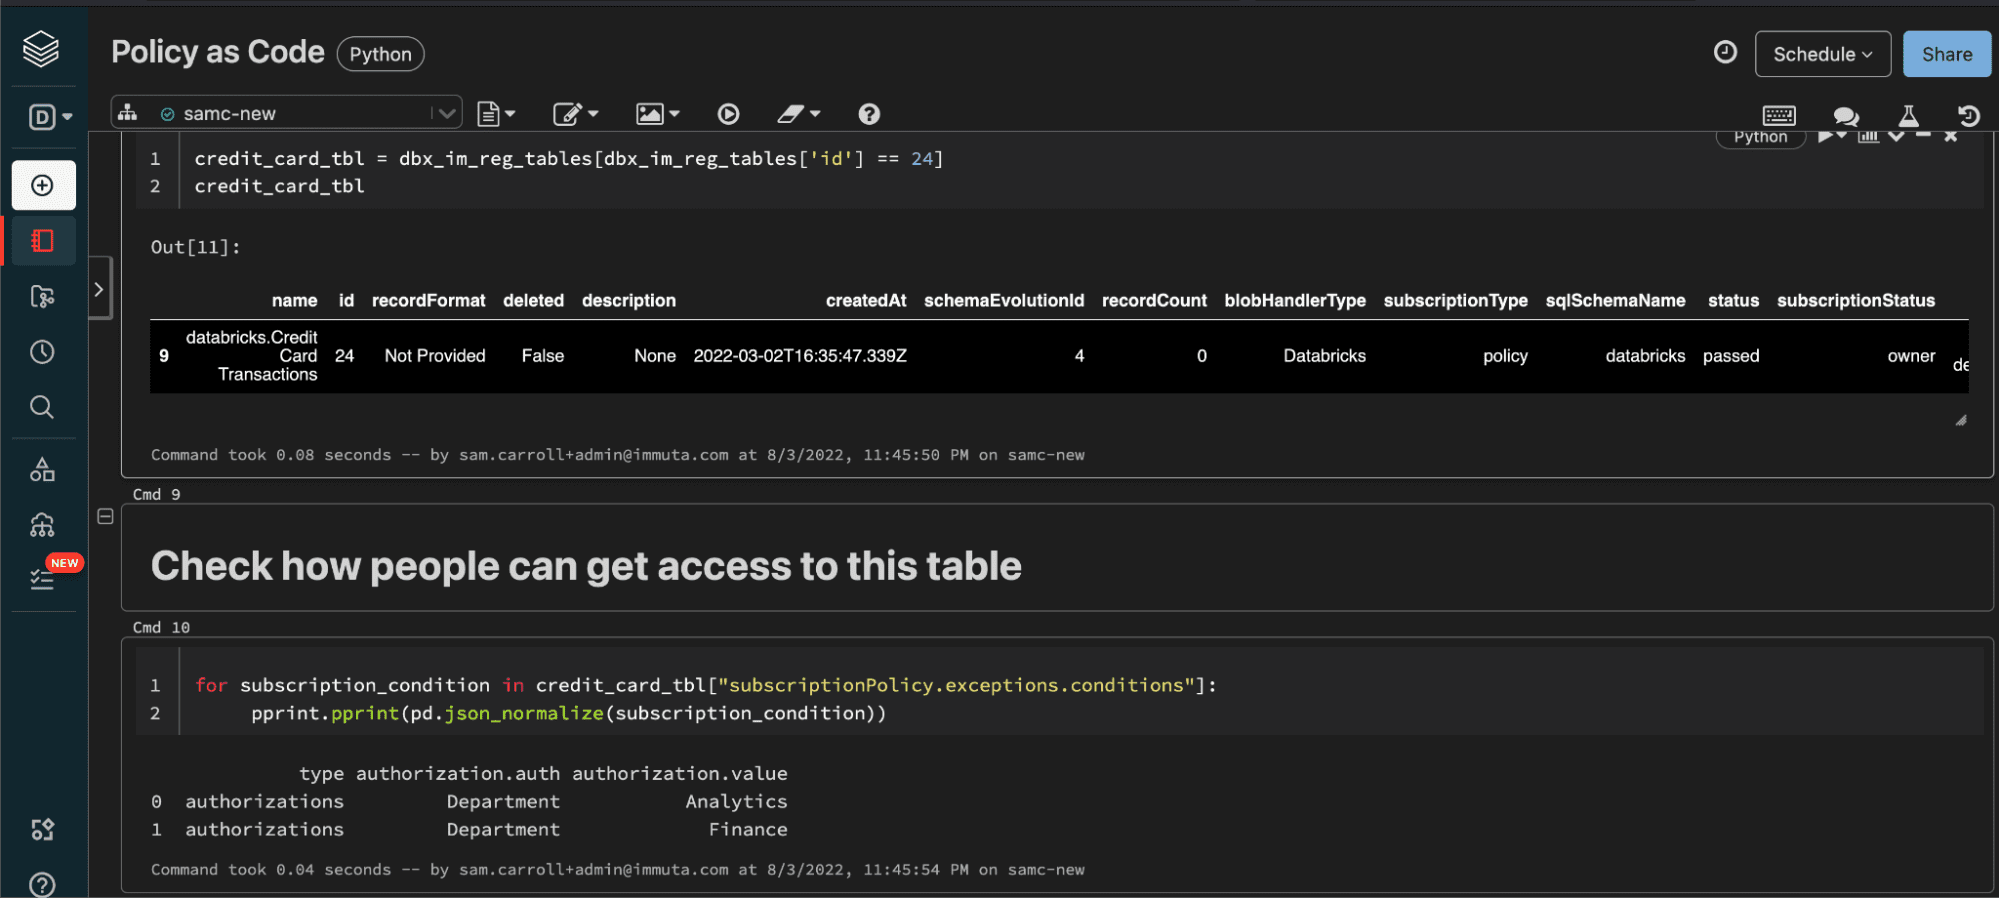
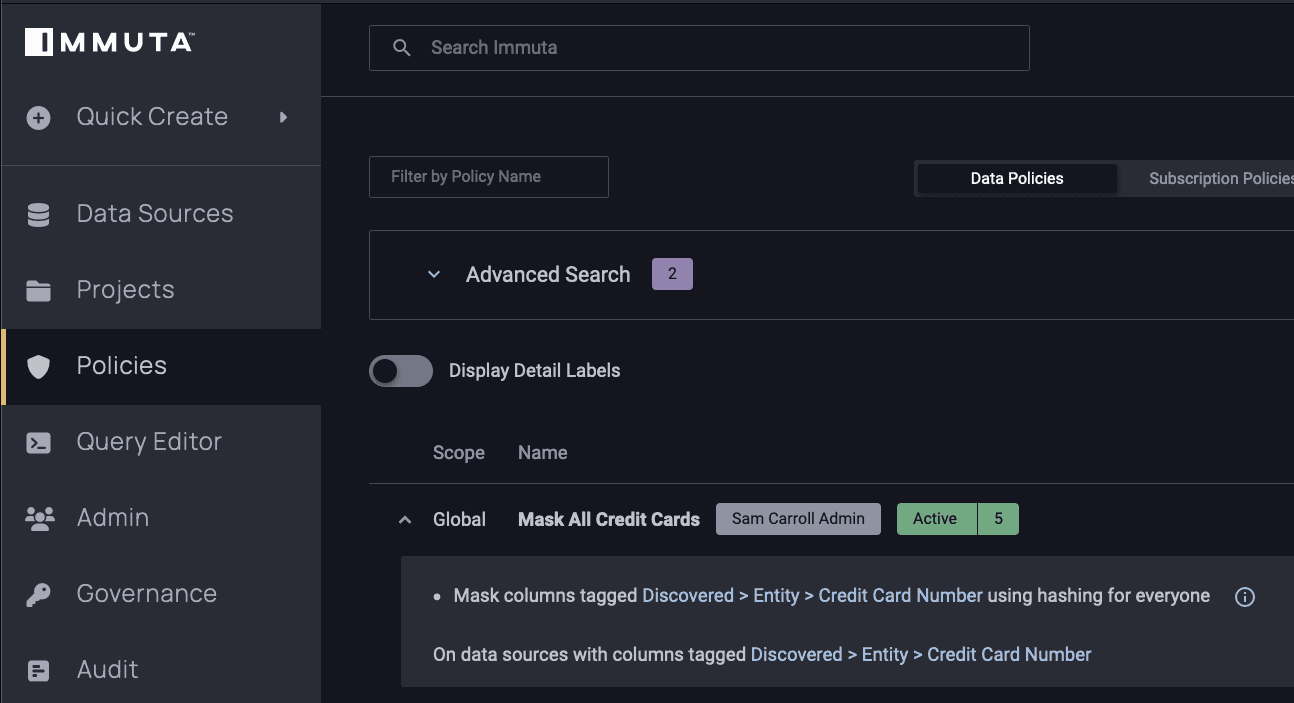
This shows that users who are in the Department of Finance or Analytics can subscribe to the data set. Investigating further, you can also see that this data set has a global subscription policy enforced on it. A global policy is one that will apply to any data set with a specific Immuta-discovered classification (in this case, credit card information):

Global policies are critical for scalability because they reduce the number of policies we have to create when adding new tables that contain this particular type of information.
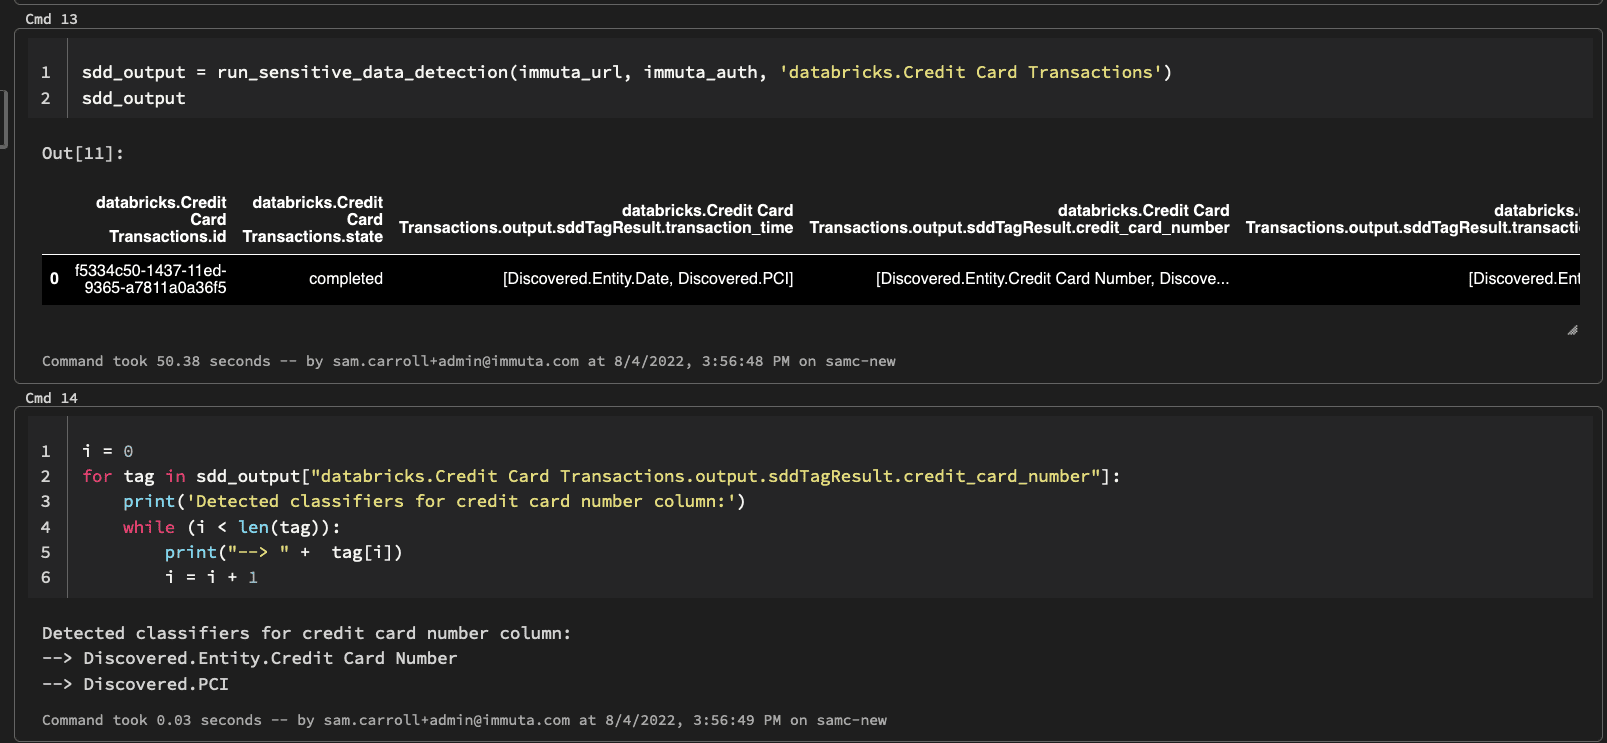
To help streamline data access management, Immuta’s sensitive data discovery can be called directly from a Databricks notebook to auto-classify data. This classification allows you to build a policy based on the contents of the data, in addition to the hard-coded column, table, or database name. Below is an example call to Immuta’s sensitive data discovery API that will return the classifiers to your Databricks notebook:
sdd_output = run_sensitive_data_detection(immuta_url, immuta_auth, 'databricks.Credit Card Transactions')
sdd_output
i = 0
for tag in sdd_output["databricks.Credit Card Transactions.output.sddTagResult.credit_card_number"]:
print('Detected classifiers for credit card number column:') while (i < len(tag)): print("--> " + tag[i]) i = i + 1
#output: Detected classifiers for credit card number column: --> Discovered.Entity.Credit Card Number --> Discovered.PCI
3. Building a Databricks Data Masking Policy As Code
Now that we see how Immuta classified the credit card number column, let’s use that classification to build a masking policy that will dynamically mask it for every column in which we find that type of data:
masking_policy = """
actions:
- description: Mask all Credit Cards rules: - config:

fields:
- columnTag: Discovered.Entity.Credit Card Number type: columnTags

maskingConfig:
type: Hash
type: Masking
circumstanceOperator: any circumstances:
- columnTag: Discovered.Entity.Credit Card Number type: columnTags

name: Mask All Credit Cards policyKey: Mask All Credit Cards staged: false template: false type: data"""
This policy will mask all data classified as a credit card number using hashing for everyone in the organization. Now, let’s tell Immuta to apply this policy:
set_immuta_policy(immuta_url, immuta_auth, masking_policy)
#output:
  dryRun creating updating policyId
0 False  True     False    35
Notice that you can now see the policy set in the Immuta UI. You could also set up policy promotion settings that require approval by a data owner/steward before activating. This is useful for the separation of duties between developers, data stewards, and data consumers.
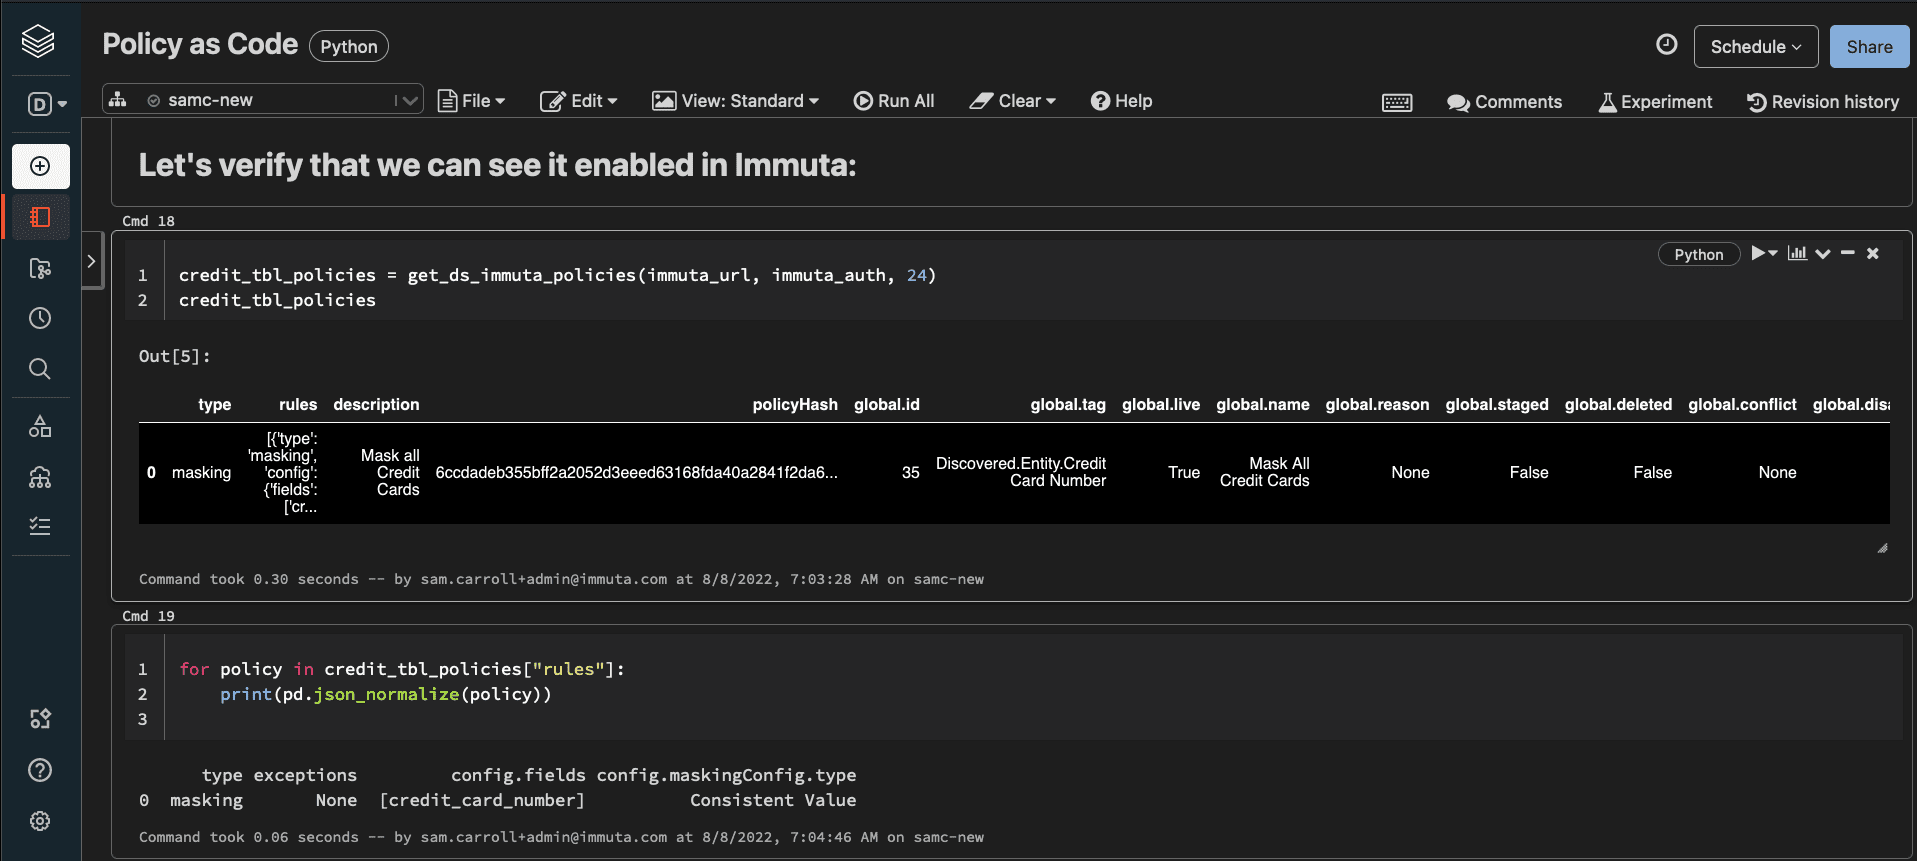
Now let’s check programmatically to see if this policy was enforced on our credit_card_transactions table using the Immuta table id we discovered earlier:
credit_tbl_policies = get_ds_immuta_policies(immuta_url, immuta_auth, 24)
for policy in credit_tbl_policies["rules"]:
print(pd.json_normalize(policy))
#output
Type exceptions config.fields config.maskingConfig.type
0 masking None [credit_card_number] Consistent Value
Finally, let’s re-run the query to see the masking policy in effect on the Databricks table:
Immuta’s integration with Databricks makes it so that the data can be masked without users even being aware that Immuta is enabled on the table, which removes any potential performance impacts. This single policy has a global scope, meaning it will automatically be applied to any table that is registered with Immuta and contains credit card information.
Immuta enables collaborative data security across all users in the organization. With Immuta and Databricks, ETL developers, business users, and data consumers can easily understand data security and share the responsibility of using all their data appropriately. By enabling policy-as-code, in addition to plain language policy authoring, Immuta helps ensure that data is protected from curation to consumption, throughout the life of the data set.
To see this in action, check out the demo below.