Have you wondered how to protect your Snowflake data warehouse with column-, row-, and cell-level protection while accelerating time to your cloud data? With Immuta SaaS on Snowflake Partner Connect, access to data is faster and more secure than ever.
Immuta provides data teams with one universal platform to control access to analytical data sets in the cloud. By automating data discovery, security, and monitoring, Immuta helps ensure speed to data access does not come at the expense of security. Snowflake Partner Connect allows Snowflake users to connect with selected Snowflake business partners like Immuta, so that they are better able to make important data access control decisions. Now, you can combine the power of Immuta and Snowflake Partner Connect because Immuta is available on the Snowflake Partner Connect (SPC) portal. This means you’re able to get up and running on the Immuta SaaS solution within minutes, so you can connect directly from the Snowflake interface and start Immuta with a single click.
How Does Immuta Work with Snowflake?
How does this work, you ask? We’ve made SPC as easy as ABC.
Immuta connects directly to Snowflake so that users can author and enforce policies in plain language, and easily mask sensitive data with Immuta, so that only the right people at your organization have access to the right data for the right purposes. For Latch, a rapidly growing provider of home, apartment, and business security software and hardware, dynamic access control and enforcement capabilities helped reduce their number of data policies from 40 to five, which in turn allowed their data team to be more efficient and productive. (You can hear from Latch about how they use Immuta with Snowflake at this year’s Snowflake Summit on June 15 at 10 a.m. PDT.)
With Immuta natively integrated with Snowflake, customers are able to leverage Snowflake Data Cloud to scale various data sharing use cases. Automated privacy, security, and tagging controls, user impersonation capabilities, and policy auditing and versioning to prove compliant data use for GDPR, CCPA, HIPAA, and internal rules, help ensure that you have advanced data privacy and security, without allowing Snowflake credits to go unused.
Immuta also helps Snowflake customers securely grant more users access to the data they can rightfully see, accelerating time to data and unblocking self-service data analytics. With centralized access and privacy control management, Immuta enables data stack modernization and expansion projects, so you can tap into your data’s full value.
To see more about how Immuta and Snowflake work together, check out this 2-minute video, and meet us face-to-face for a demo at this year’s Snowflake Summit from June 13-16. We’ll be on site and hosting speaking sessions with our customers where you’ll learn how Immuta’s fine-grained access controls have allowed them to ensure data can only be used by the right people for the right reasons, and how to monitor and audit data activity to ensure compliance.
How Do I Use Immuta with Snowflake Partner Connect?
In this section, we’ll walk you through a setup of Immuta via Snowflake’s Partner Connect. Note that this is only applicable for Snowflake accounts that do not already have Immuta Integration set up.
The setup process comprises three parts:
- Connecting Immuta in Partner Connect
- Registering tables in Immuta
- Creating a policy in Immuta
Let’s get started! Please use your account under a Snowflake annual contract, not a free trial or a pay-as-you-go account. For details on finding Partner Connect, check here.
1. Connecting Immuta in Partner Connect
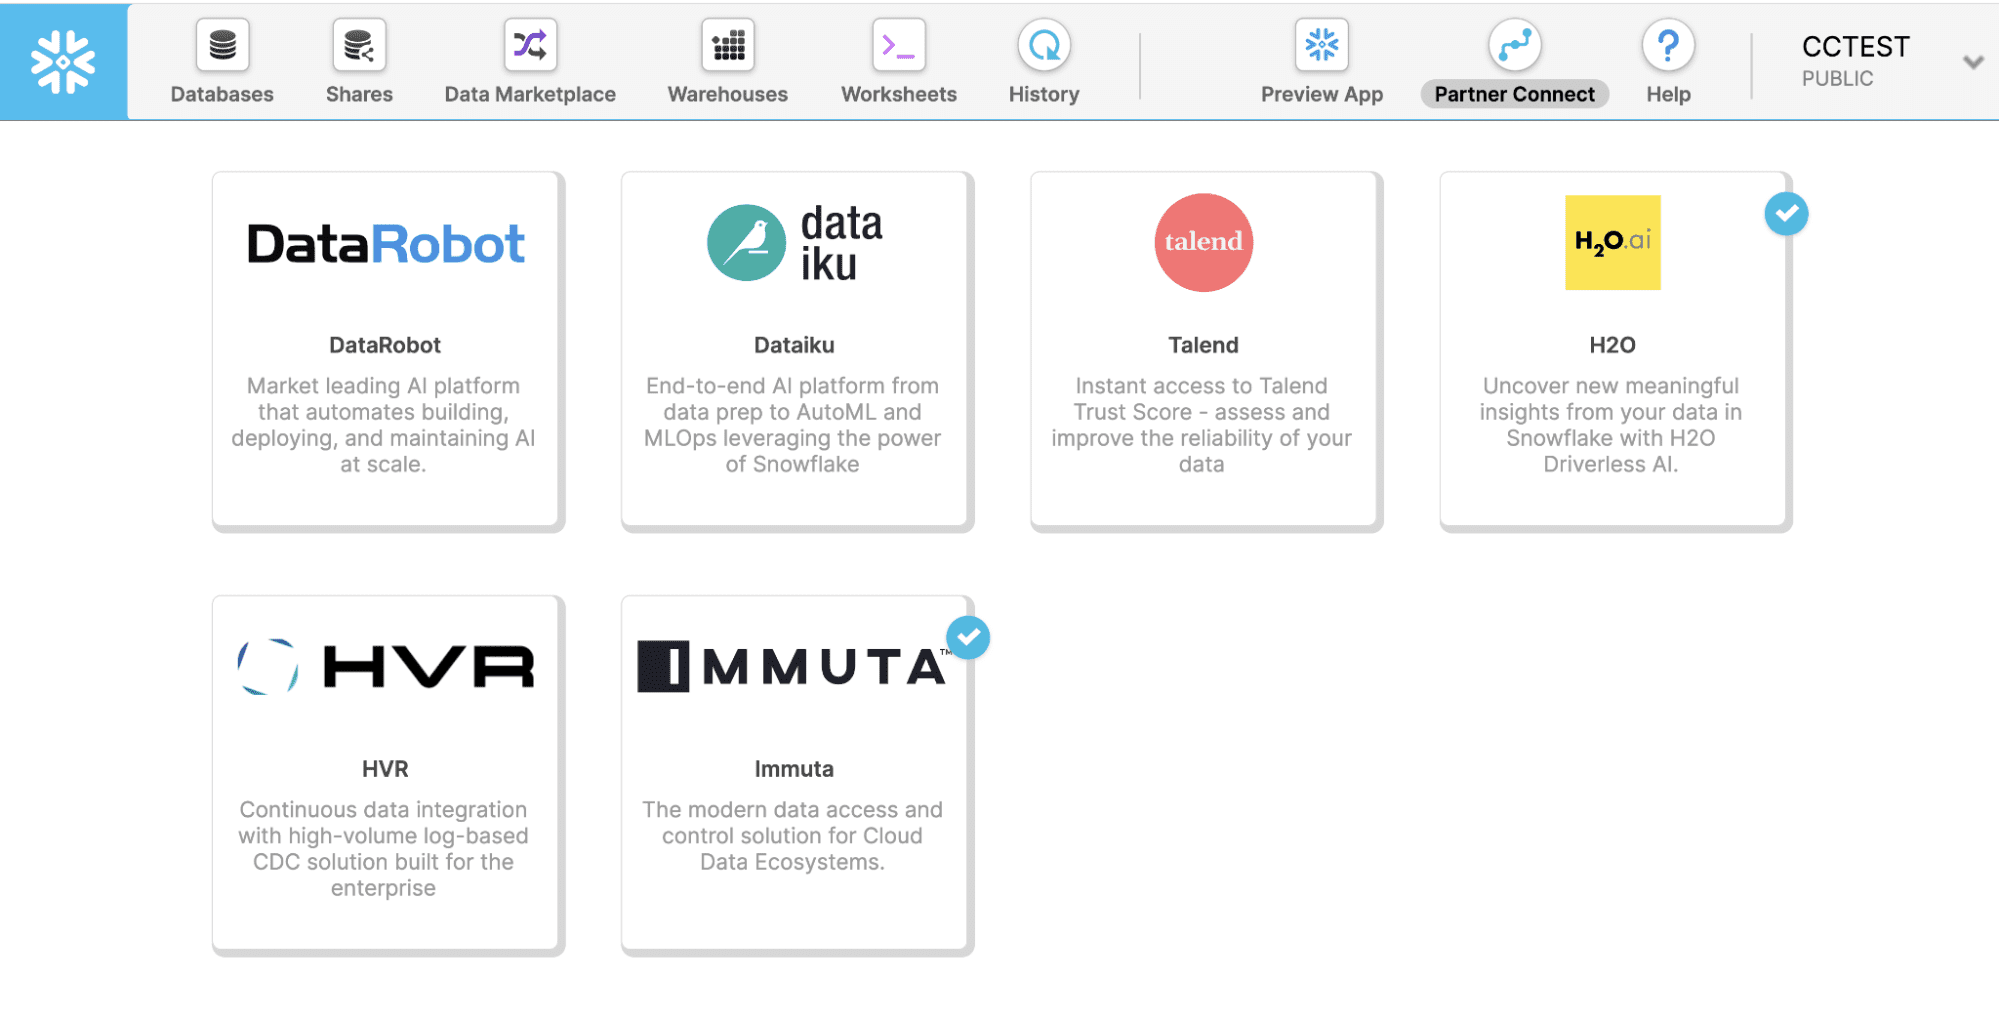
The first step is to log in to the Snowsight UI. After logging in, navigate to Partner Connect and search for “Immuta” in the search bar:
Next, fill out the form. Make sure to give Immuta read access to the SNOWFLAKE_SAMPLE_DATA database for this example:

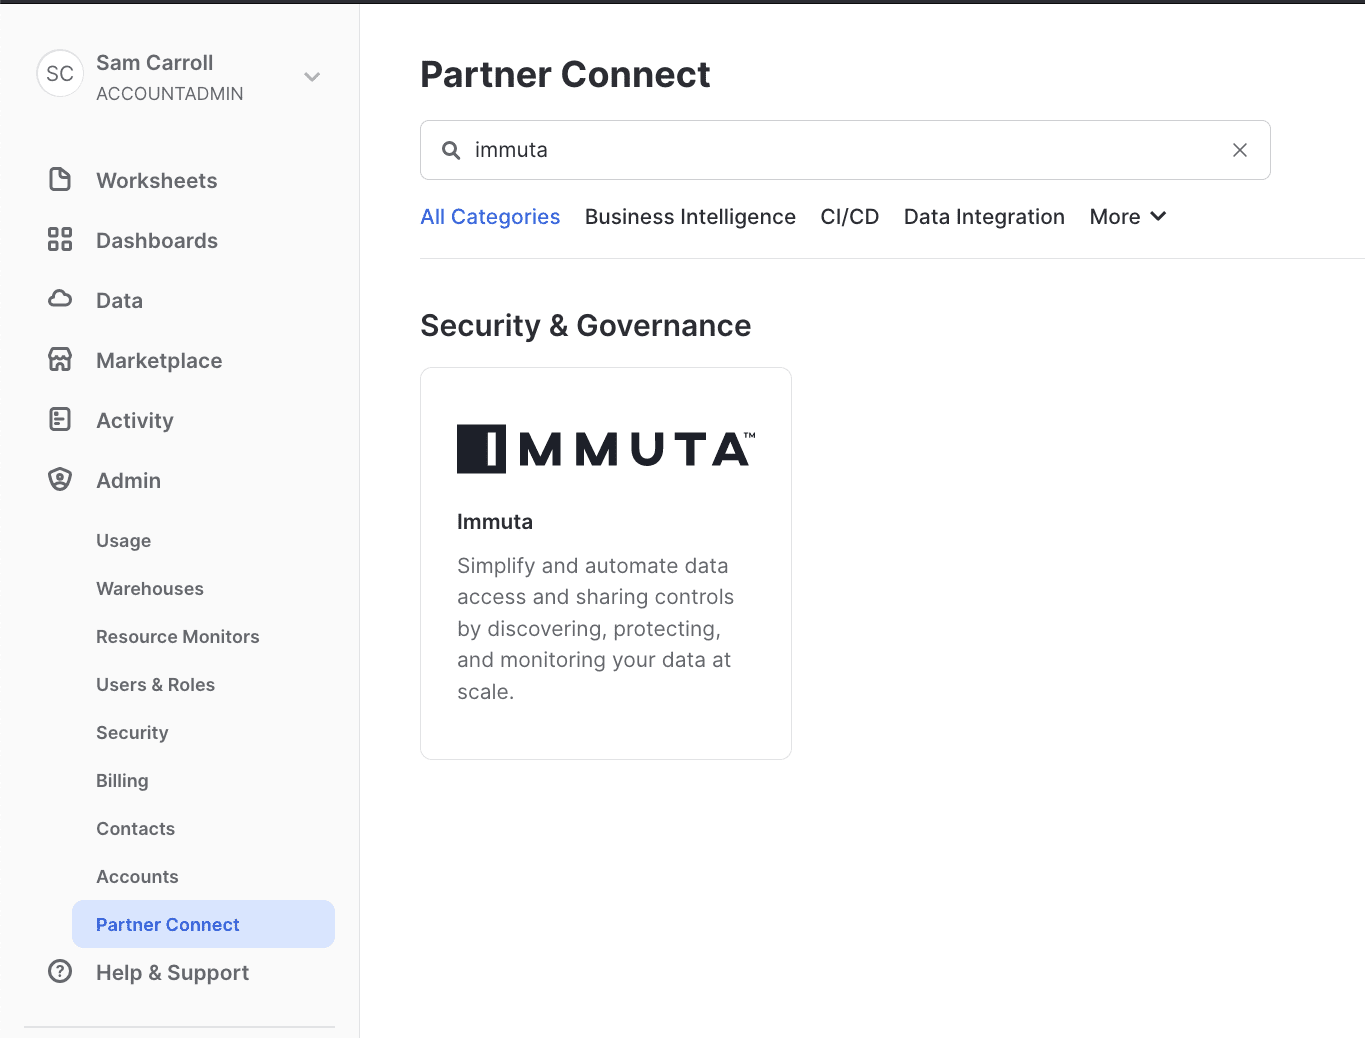
After selecting “activate,” check your email for a link to your Immuta instance:
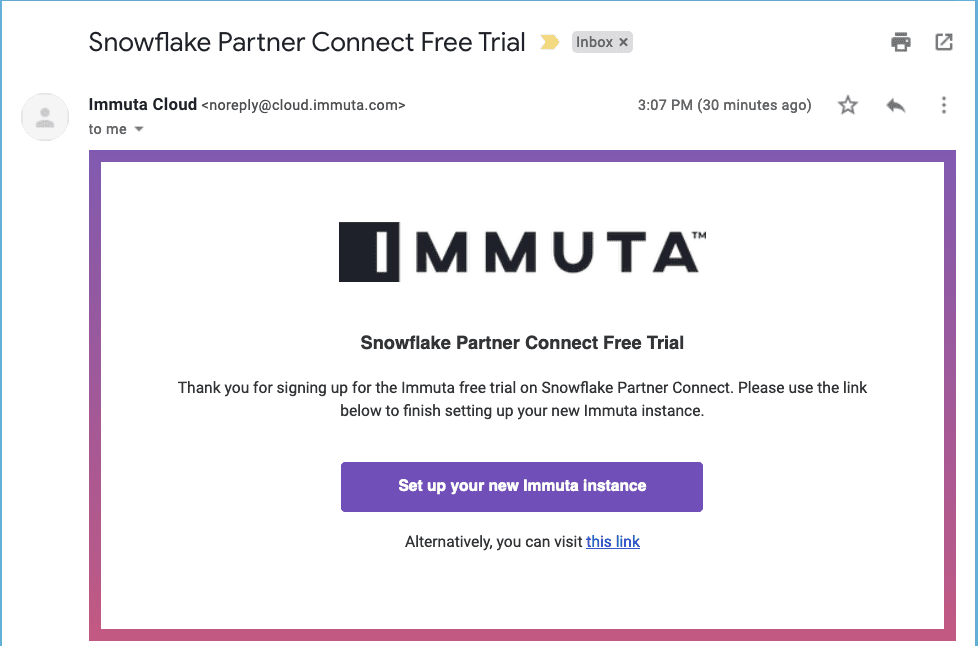
Once you click the link, you’ll need to pick the AWS region you’d like your instance to deploy in, as well as the DNS name:
Next, Immuta will start provisioning your instance:
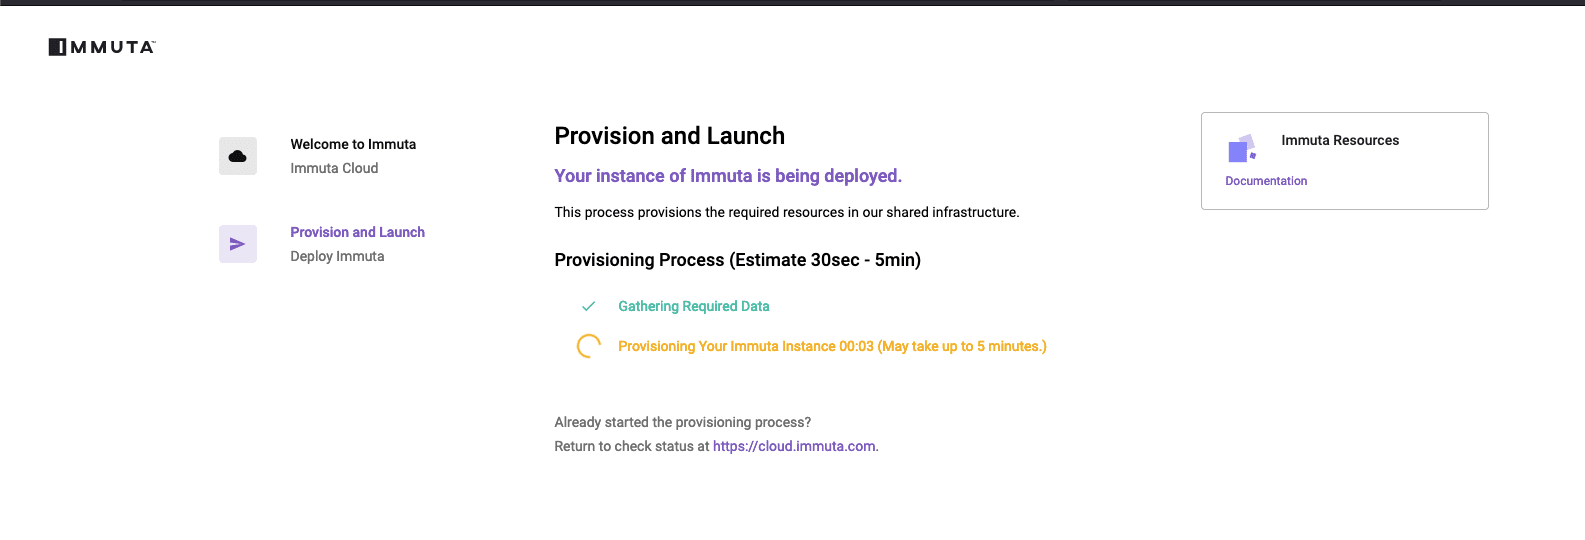
When provisioning is complete, you will be greeted with this dialog:
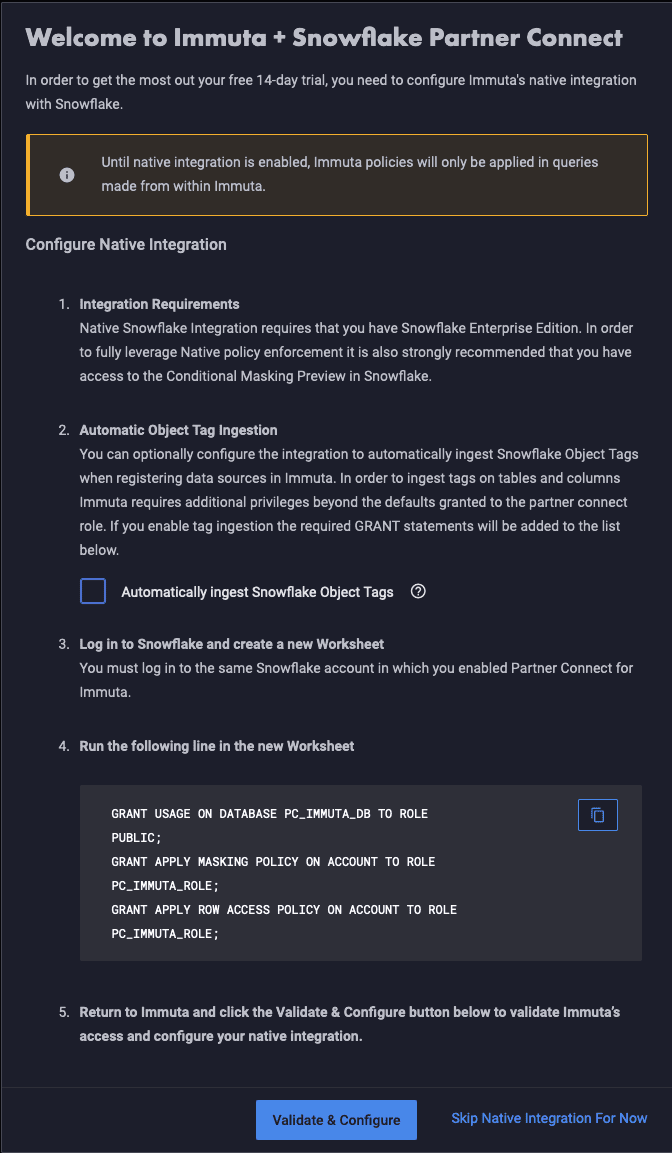
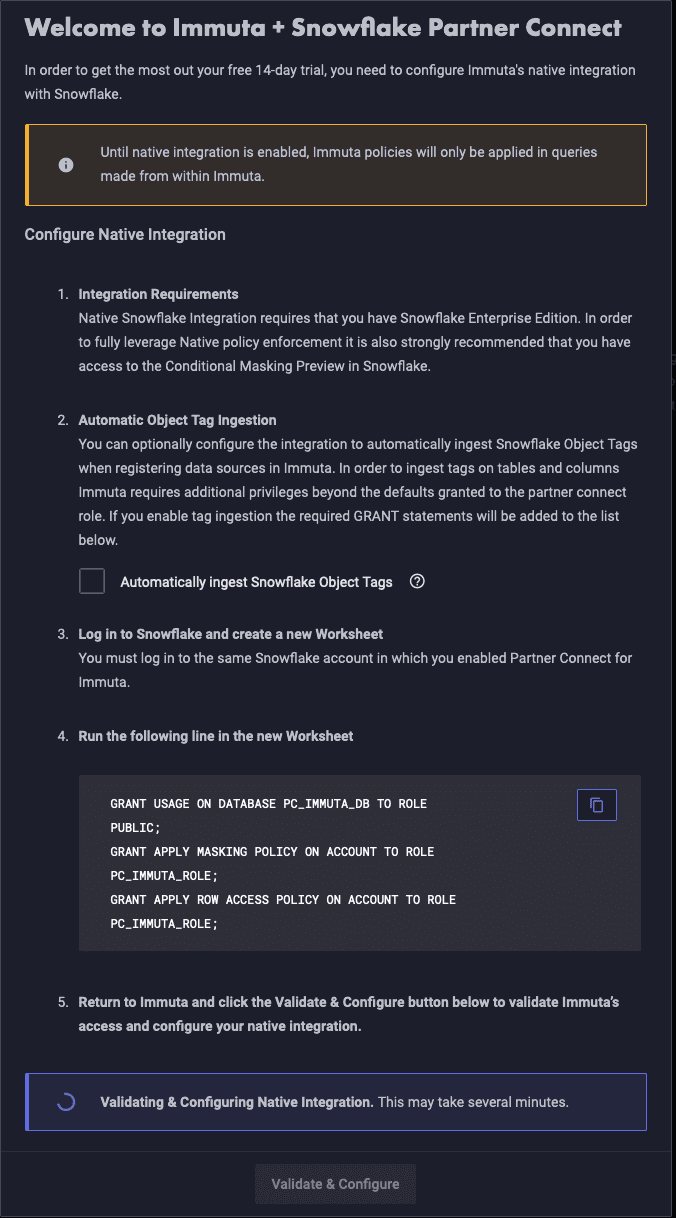
Copy the SQL commands and run them in a worksheet per the instructions, then hit “Validate and Configure”:
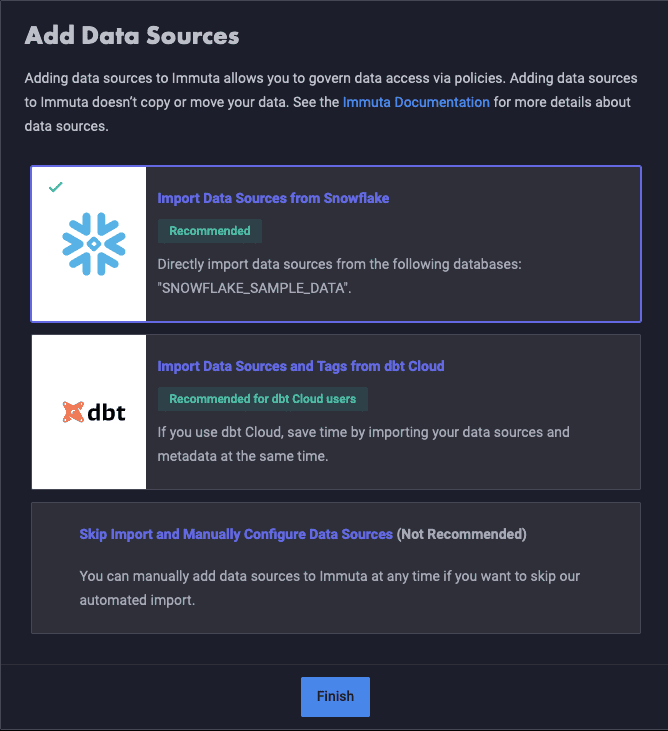
2. Registering Tables in Immuta
Once the integration is set up, select the “Import Data Sources from Snowflake” option and hit finish:
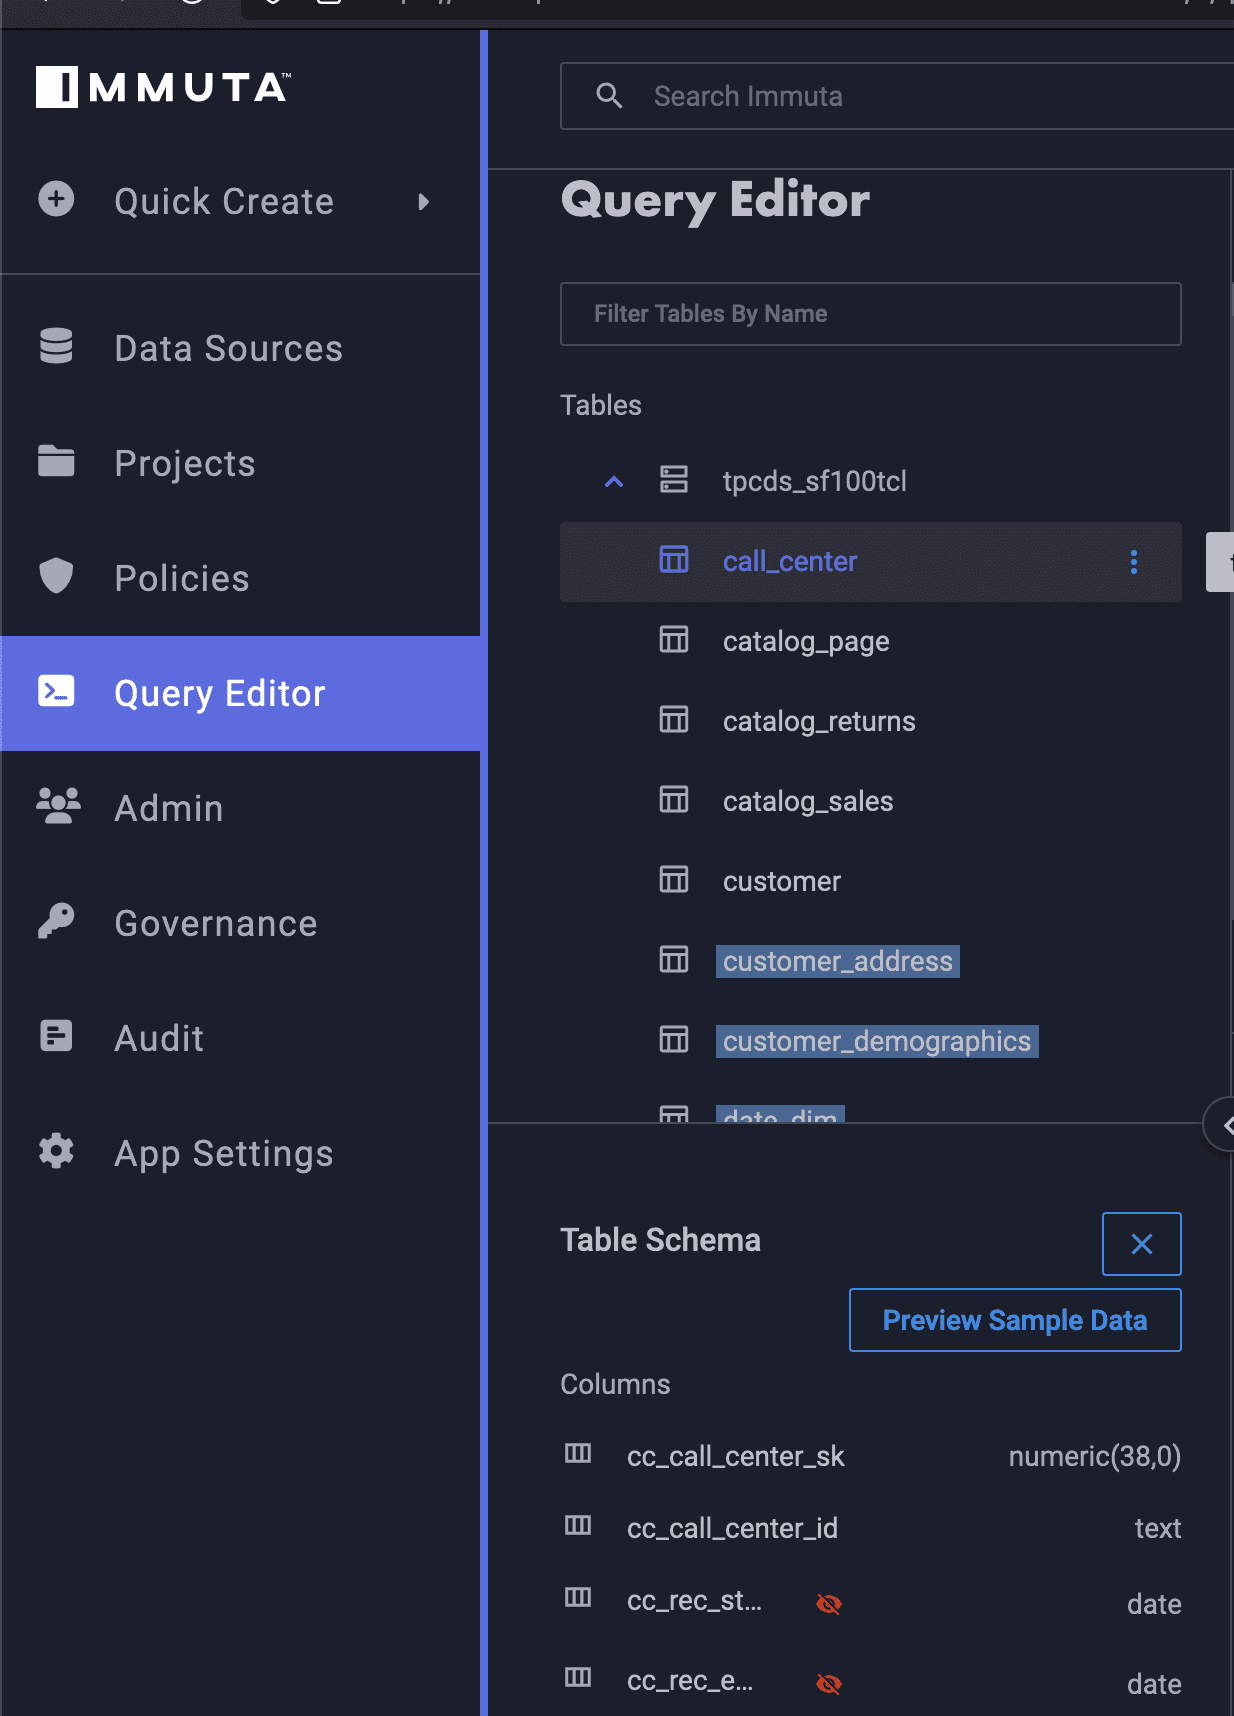
You will now see all the Snowflake data sources appear in your Immuta instance:

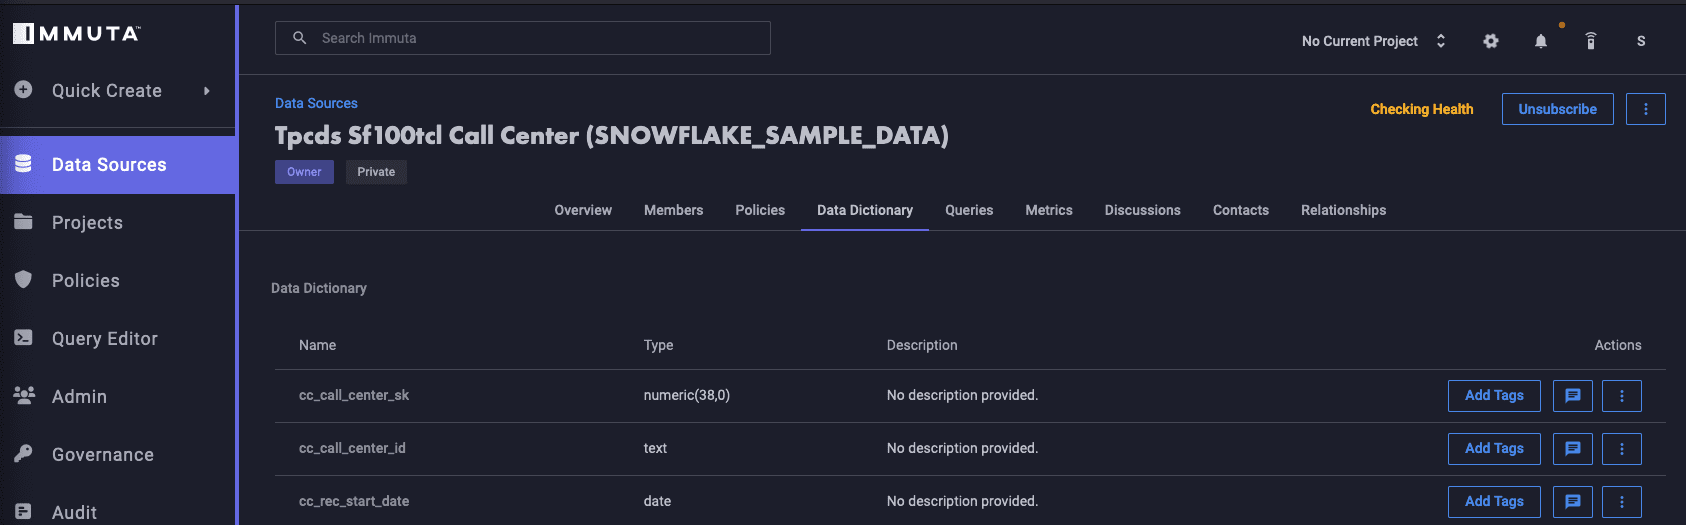
Immuta automatically runs Sensitive Data Discovery (SDD) on these sample tables to automatically classify the contents of the data. Browse to the first “Call Center” data set and navigate to the “Data Dictionary” tab:
If you don’t see any tags yet, it might be that SDD is still running. You can check by selecting the “Checking Health / Healthy / Unhealthy” status indicator in the top right:
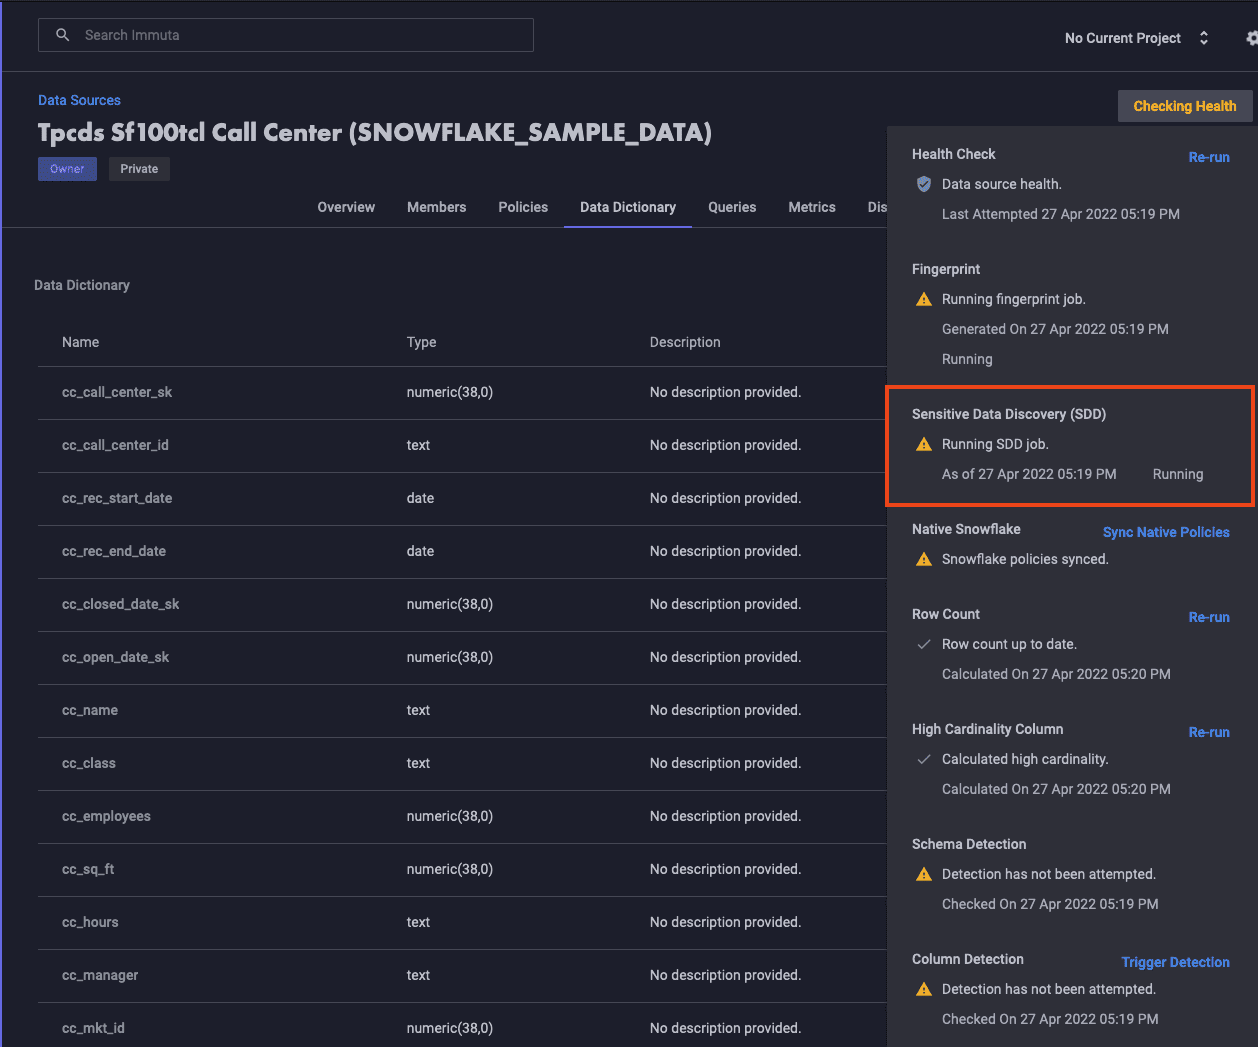
Once SDD is complete, you will see the classification on this page:

3. Creating a Policy in Immuta
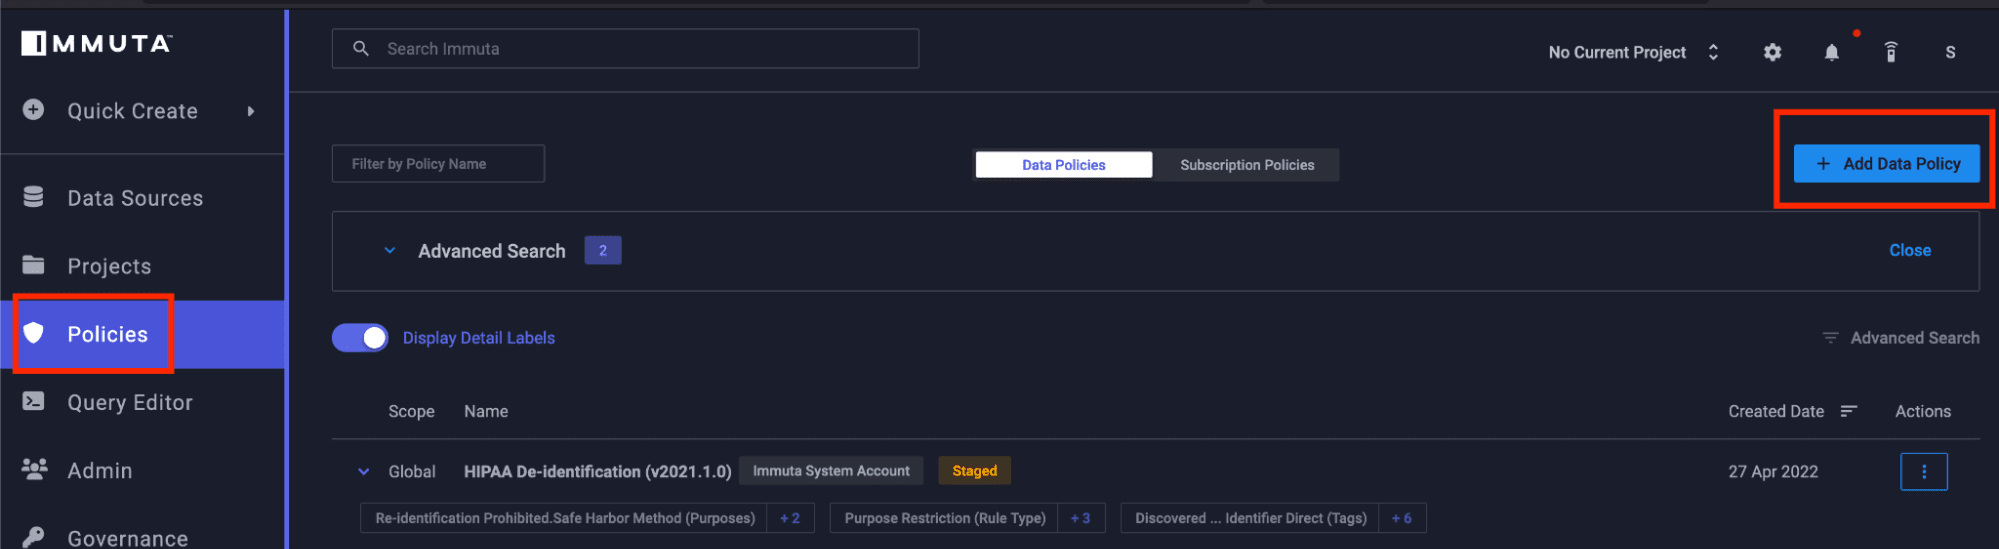
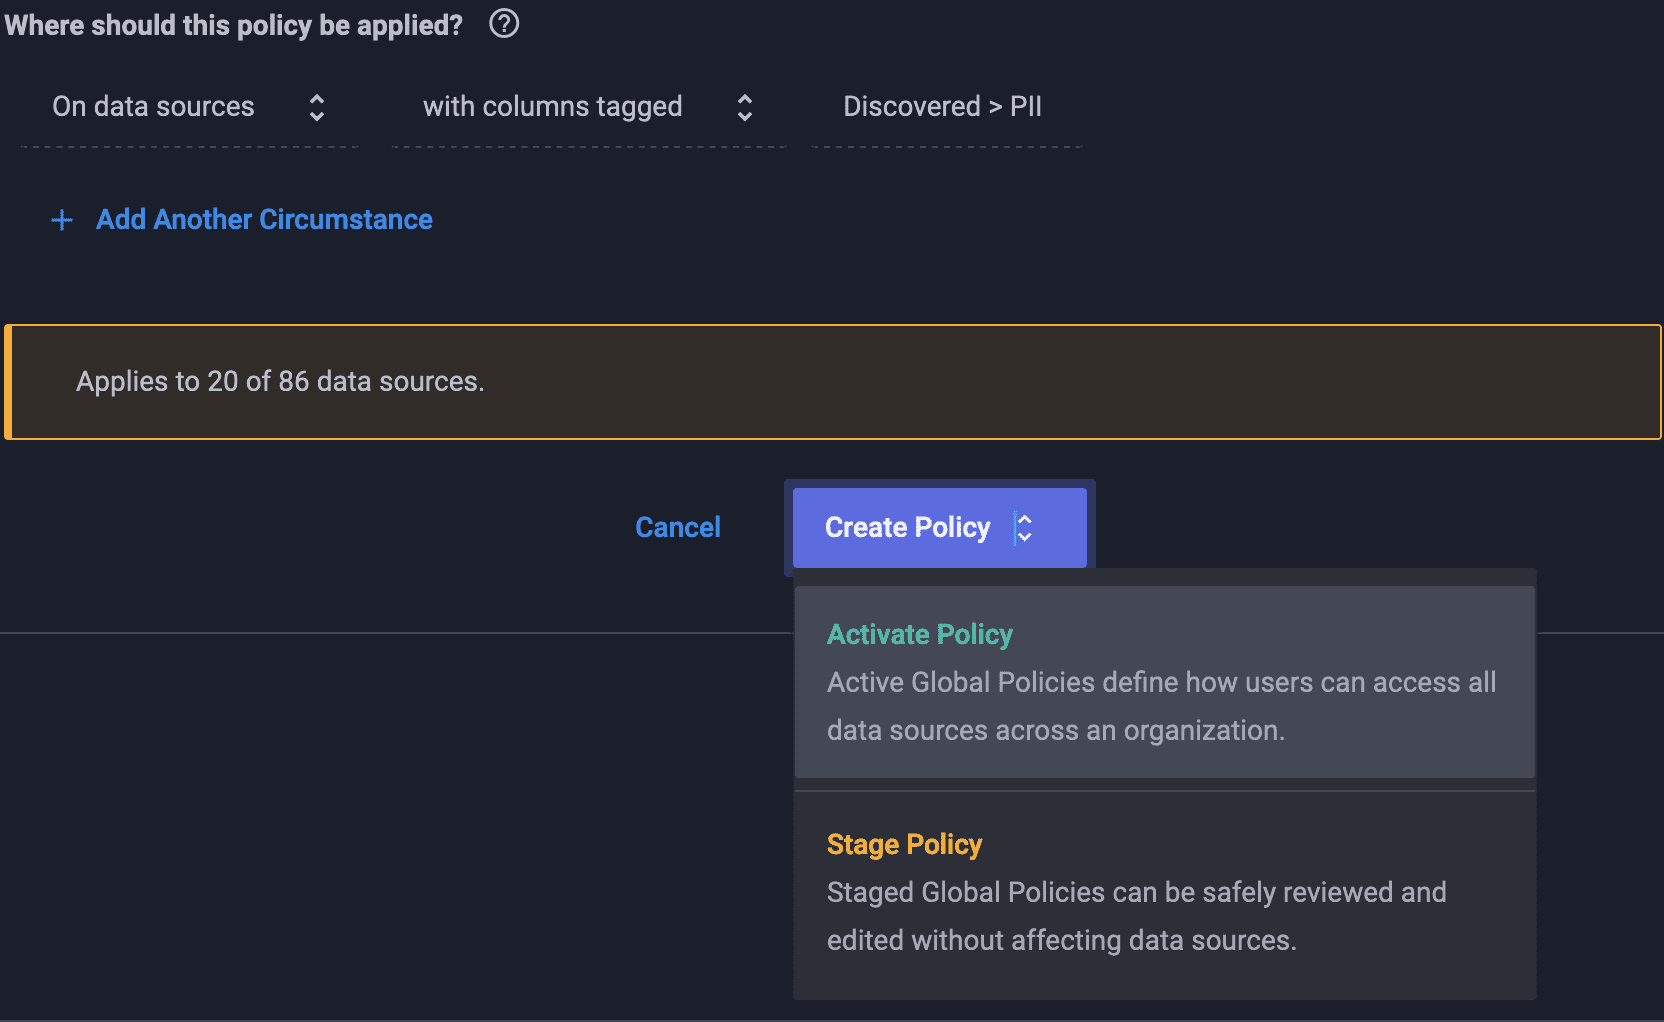
Congratulations, you are now ready to build a policy in Immuta! To do so, you’ll go to the main policy editor screen and build a policy to mask any PII (personally identifiable information):
Next, you’ll land in the policy creation window. Note how easy it is to understand these policies! Below is an example policy we will create:
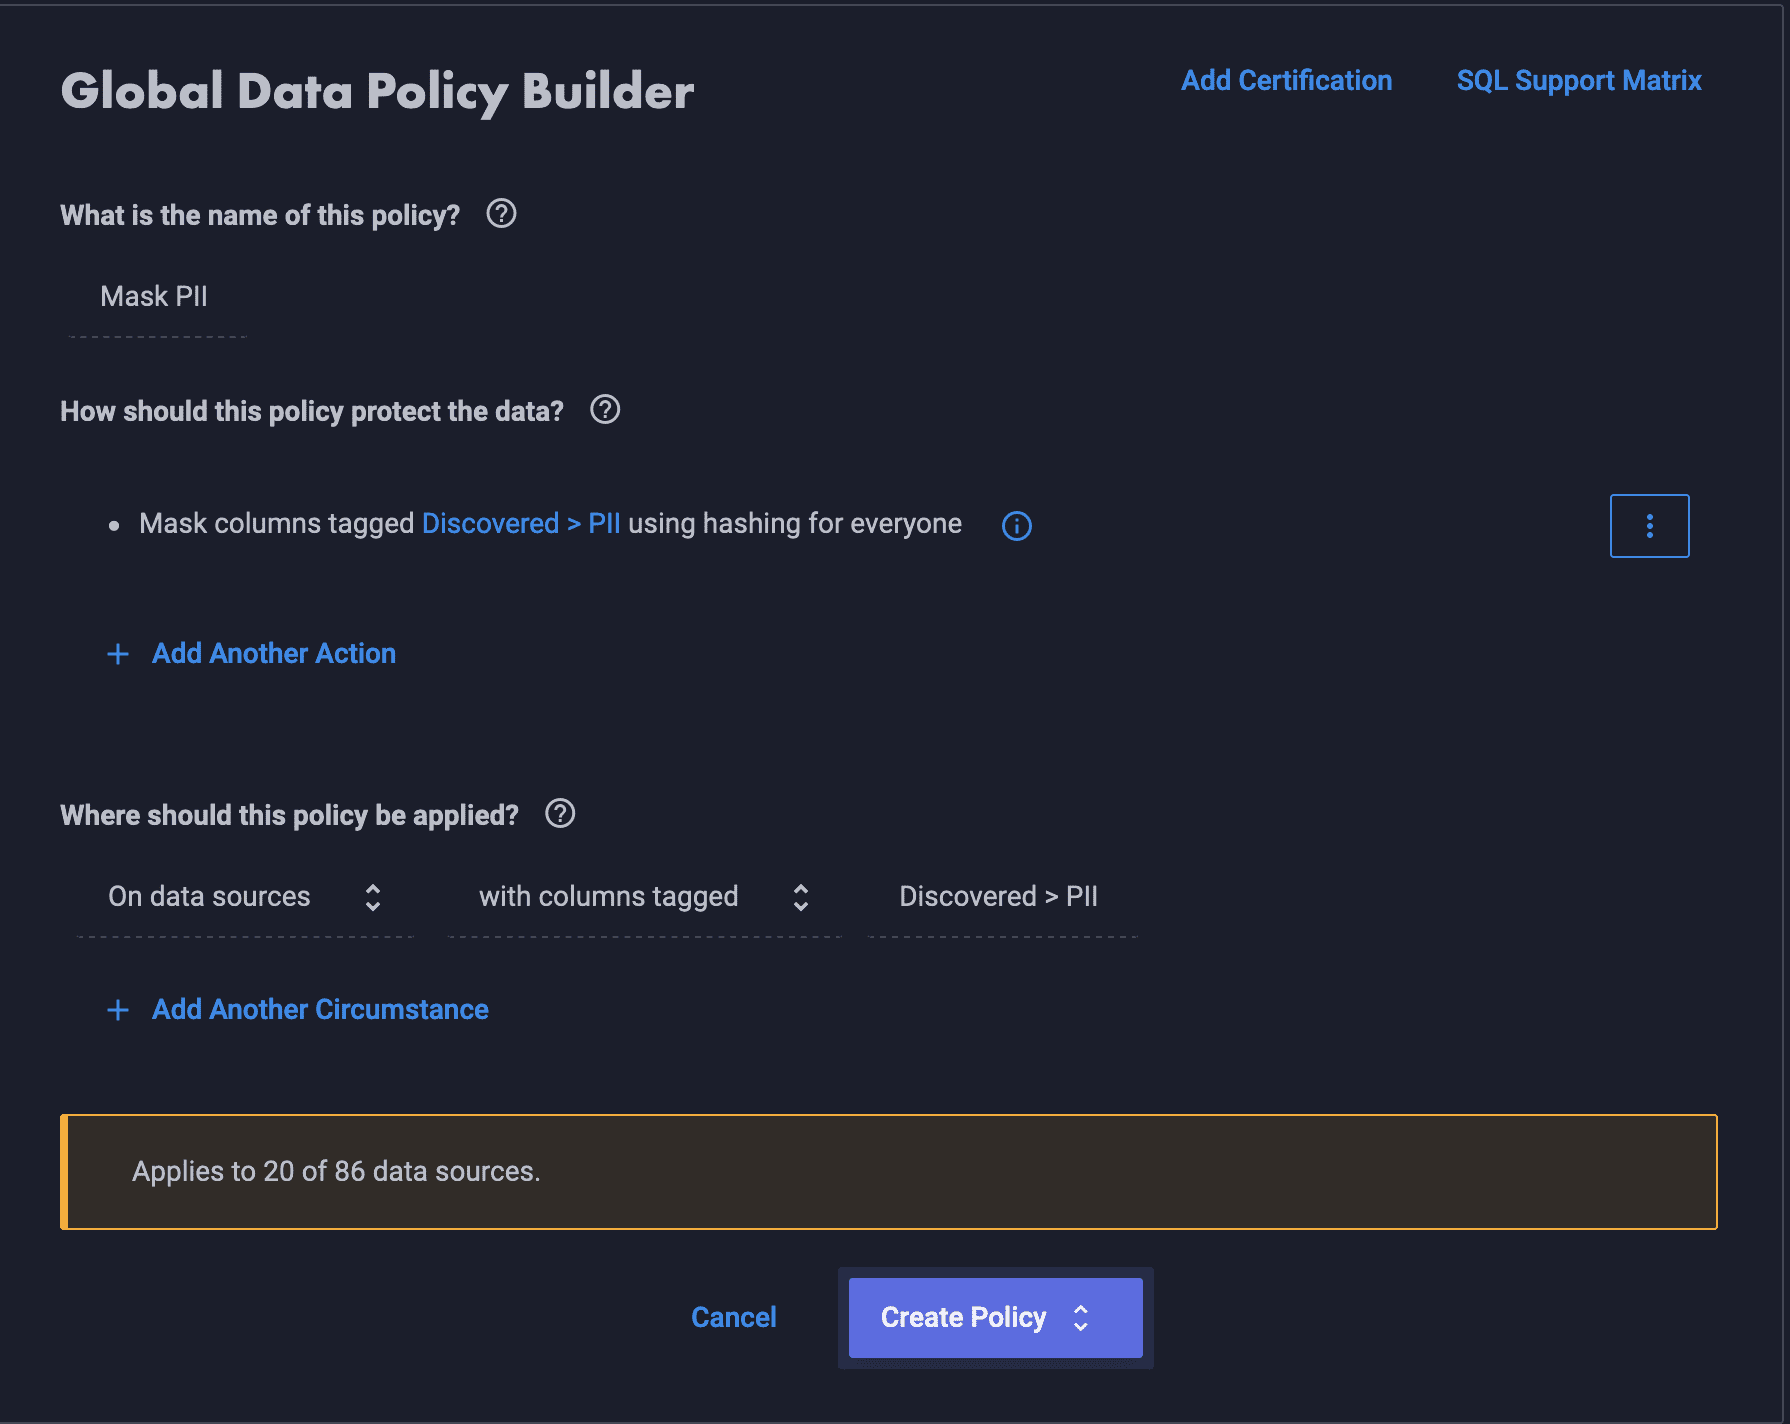
Now hit create and activate:
Next, you’ll switch over to the built-in query editor to validate the applied policy. In this test, we will query via Immuta. However, this policy has been pushed into Snowflake as a Snowflake masking policy so that you could query it in the Snowsight query editor as well.
Note how the two columns classified as PII are showing a hidden icon. Hit “preview data” to see the policy in action.
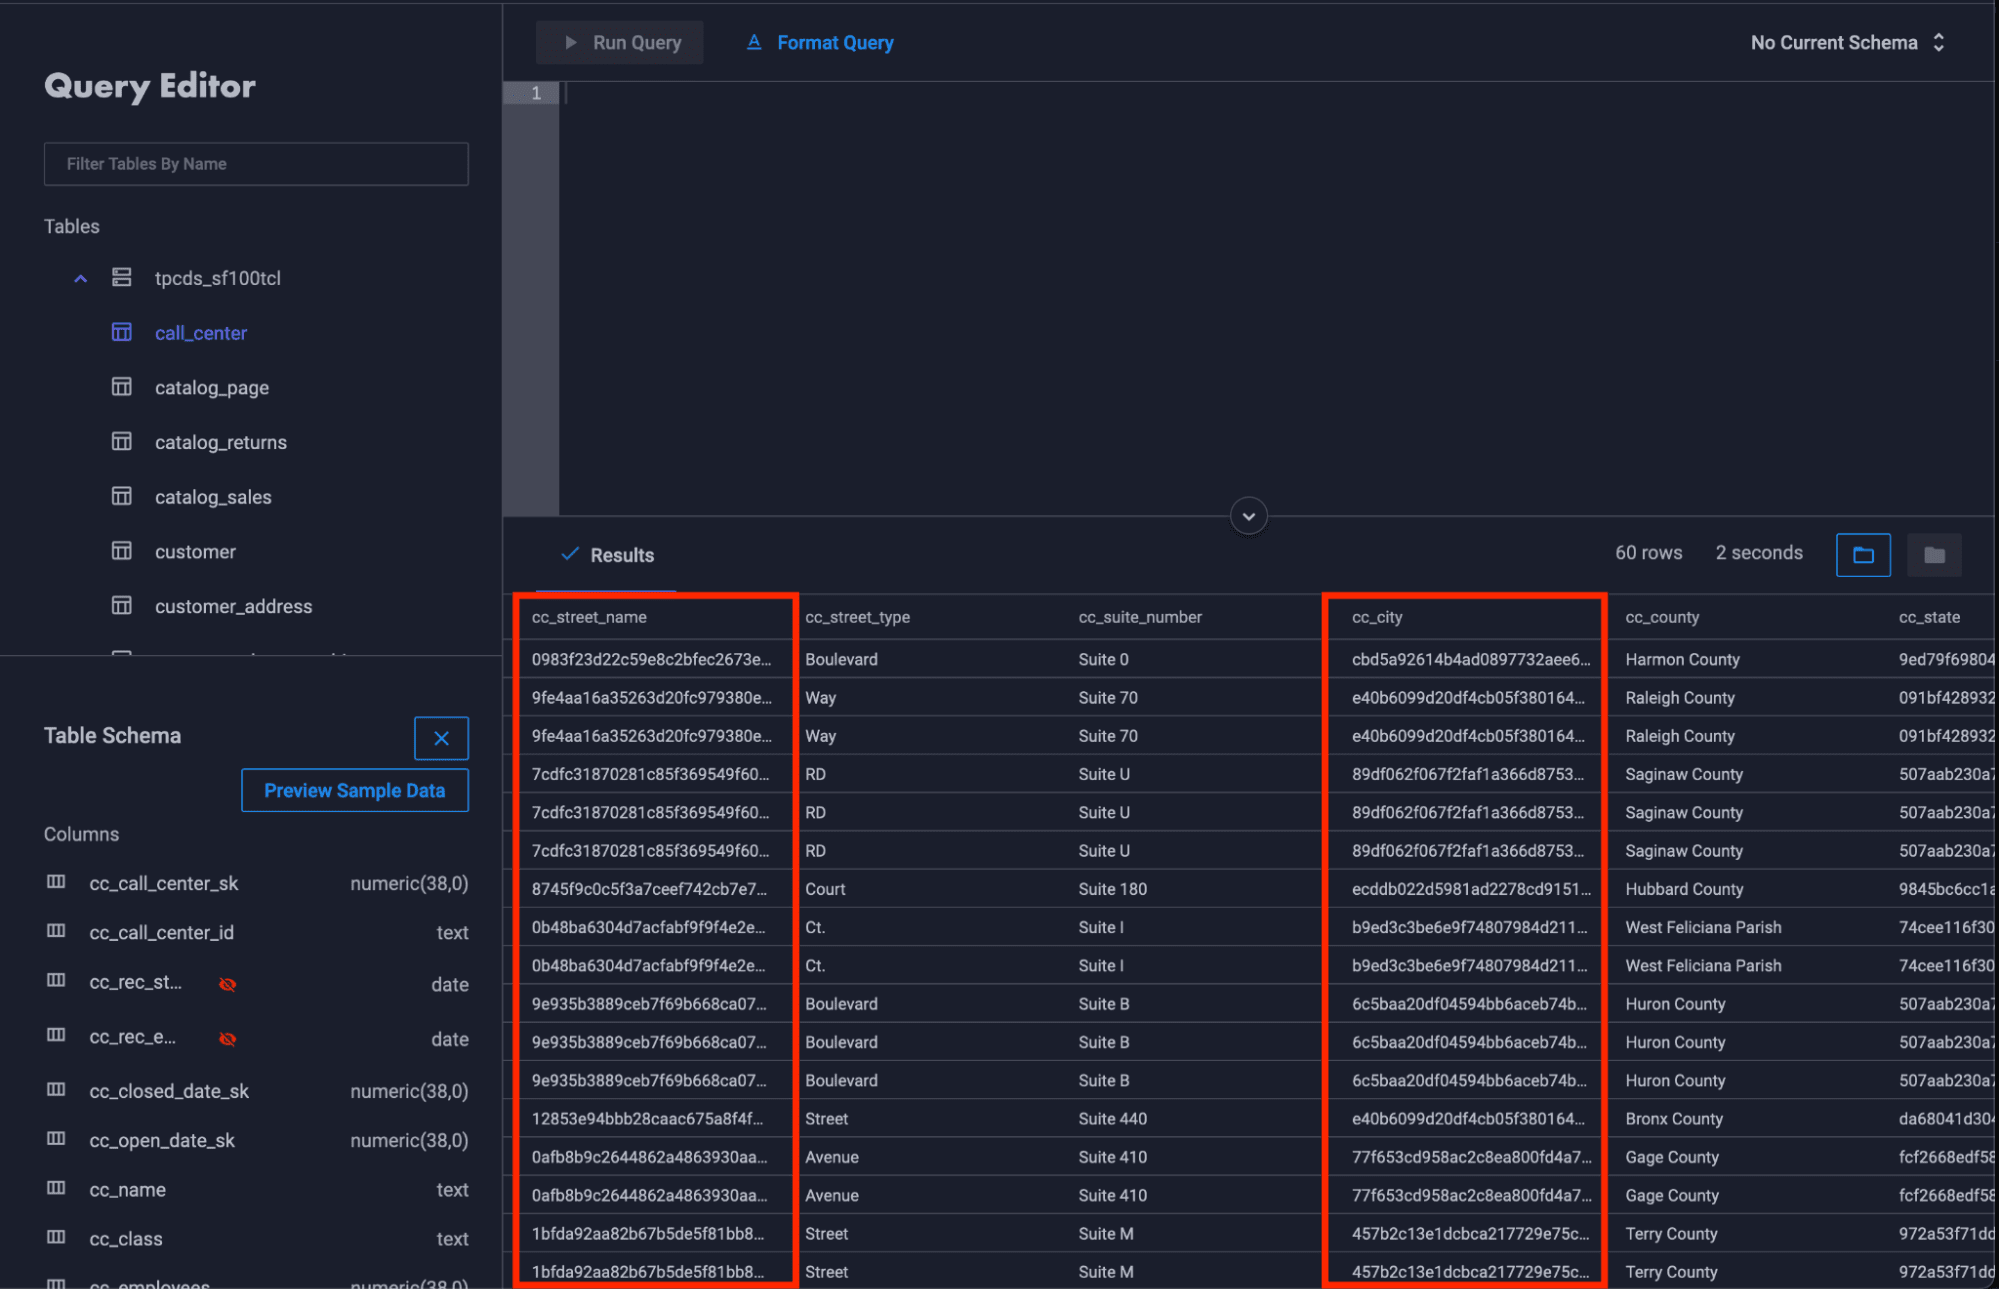
Notice how all columns classified as PII across all data sources classified are now masked. This policy is transparent to the user because Immuta created a Snowflake masking policy and associated it with the base table in the respective database, so there is no impact to the regular user workflow. Furthermore, this policy will automatically apply to all future data sources classified as such. You can also refine the policy to apply to users based on attributes captured in identity management systems, such as Okta.
To see this in action, check the video below to see for yourself how easy it is to mask data with Immuta. This is a quick overview showing how Immuta unblocks use cases to expand Snowflake’s capabilities across organizations through understandable policies authored in plain language, which speed up security approvals and increase new Snowflake workloads. A single Immuta policy can help Snowflake users scale additional tables and data consumption without having to manage role explosion or requiring data engineers to author controls.
Now that you have this step-by-step guide, keep it handy and connect to Immuta SaaS using your account under Snowflake annual contract on Snowflake Partner Connect. For questions on this workflow, a deeper dive into Immuta, or to see a product demo reach out to [email protected].